It is true that Apple is among the most successful and popular smart phone manufacturers in the world. Generally, Apple is known for its smooth functionality and advanced features.
However, just like any other smart device, iPhone also tend to give some problems. And, “iPhone camera not working” is one of those common complains iOS users generally do even for iPhone 14. If you have faced such issue, read this article on as it comprises of several remedies.
Common iPhone Front/Back Camera Not Working Problems
First of all, let’s take a look at all the possible problems related to front or back cameras of iPhone.
- The camera app doesn’t work (it is very slow or not focusing).
- Rear camera of the phone doesn’t show anything at all.
- The camera app screen goes black and freezes when switching between front and rear cameras.
- Some of the options related to camera doesn’t work properly (for instance, Camera Roll, HDR, Flash).
- Camera flash is not properly synchronized with the shots you take.
Reasons Why iPhone Front/Back Camera Not Working
Now you have a basic idea about the potential issues related to iPhone camera, let’s see the possible reasons behind them.
- Due to faulty Camera App.
- Your iOS is not updated recently.
- Faulty iOS update.
- Software bug.
- Malware (rare).
- Camera lens is covered.
- Hardware issue of the iPhone.
6 Basic Solutions to Fix iPhone Front/Back Camera Not Working
Now, let’s see how we can address iPhone 12/11/XS Max/XS/XR/X/8/7 camera shaking and not working issue.
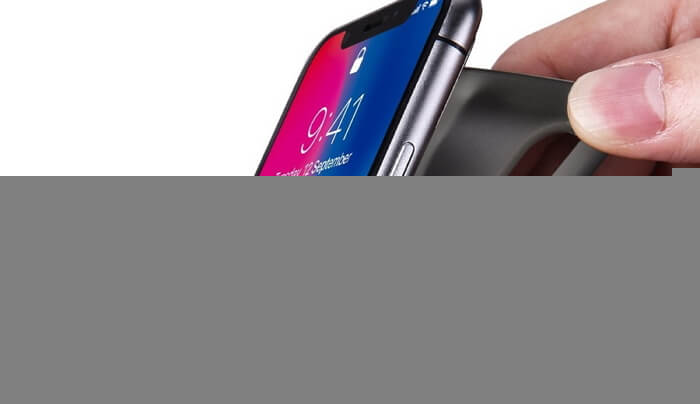
Solution 1. Remove Case from iPhone
This method is particularly applicable when iPhone back camera is not working. Just remove the case off and see if the camera works again.
Solution 2.Restart Your iPhone
If your iPhone front camera not working (or rear camera), just perform a restart on the device.
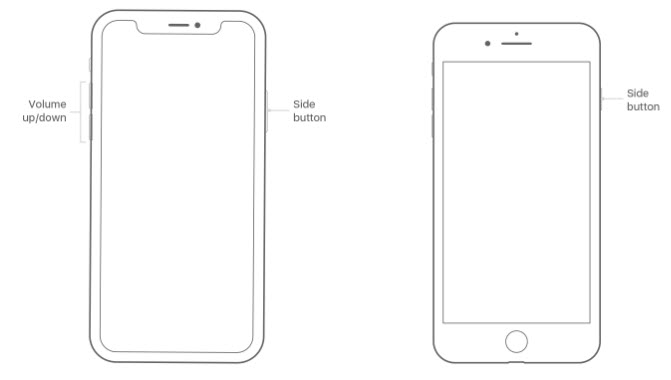
iPhone X or later (iPhone 11/12/13/14/15 included):
Step 1: Press and hold the Side button and any of the volume buttons.
Step 2: Hold the buttons till power off slider appears.
Step 3: Drag the slider to turn the device off.
Step 4: Press the side button and hold it to see the Apple logo.
iPhone 8 or older:
Step 1: Press top button and hold it to see the power off slider.
Step 2: Drag it so you can turn the device off.
Step 3: Once it is switched off, press the top button once again and hold it to see the Apple logo.
Solution 3.Clean Camera Lens
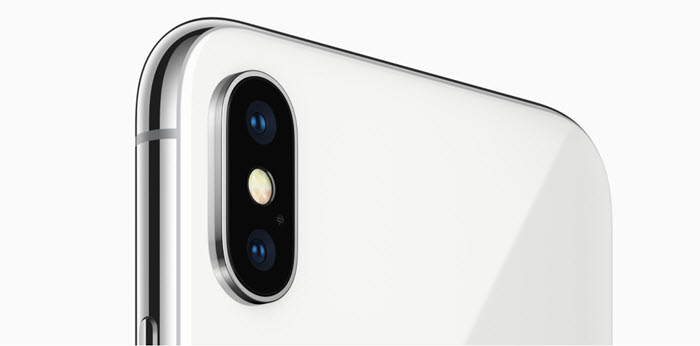
Sometimes, your iPhone X camera not working just because it is obstructed with dirt. So, clean it with a polishing cloth.
Solution 4. Quit Camera App
Quitting the camera app is another way to address this issue.
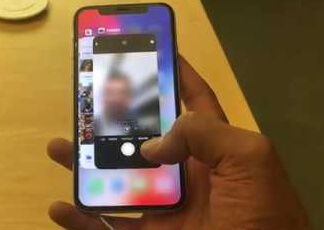
iPhone X or later (iPhone 15 included): swipe up from the bottom of the screen. Then, pause somewhere at the middle.
iPhone 8 or earlier: double tap the Home Button to see the apps used recently.
Swipe horizontally to navigate to the camera app and then swipe up the app to quit it.
Solution 5. Upgrade iOS Version
If the iPhone front or back camera not working, you might be having an outdated iOS, especially when the camera becomes blurry after iOS update. You can simply upgrade it to solve it.
Step 1: Go to Settings app and choose General.
Step 2: Select Software Update.
Step 3: You can see that the latest iOS version is available. All you have to do is to tap on the “Update and Download” option.
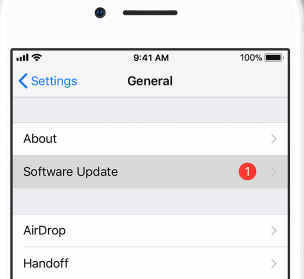
Note: Be sure that there is a stable network and have enough juice before starting the process.
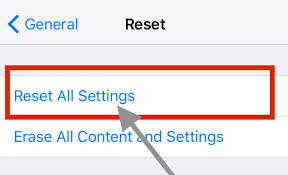
Solution 6. Reset All Settings
When resetting all the settings, your WiFi passwords and all the connections will be reset.
Step 1: Go to Settings and select General.
Step 2: Select Reset.
Step 3: Select Reset All Settings. This will bring your device back to its original settings. Check if the camera is working now.
3 Advanced Ways to Fix iPhone Front/Back Camera Not Working
All options we have mentioned above are basic solutions. If none of those remedies address this issue, you can try these advanced options.
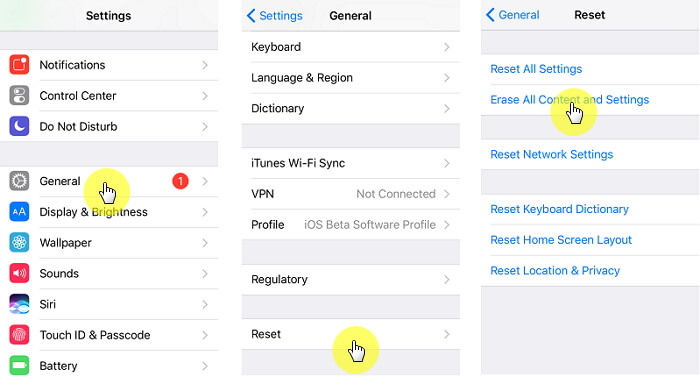
Way 1. Erase All Content and Settings
This option will remove all the data off your device. As a result, you will lose videos, photos, contacts etc. on your device. So, we suggest you to create a backup before proceeding.
Step 1: Go to Settings app and select General.
Step 2: Select Reset and choose Erase All Content and Settings. You can now reset this device as a new one.
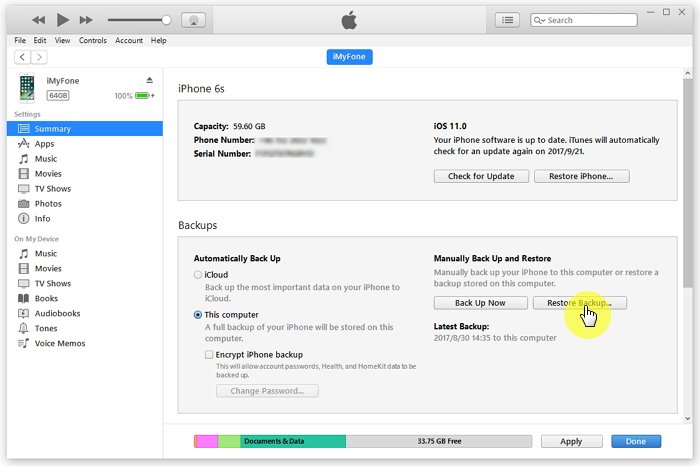
Way 2. Restore iPhone via iTunes
This is another advanced method that will fix the issue but you will lose data.
Step 1: Open iTunes and connect the device to the same computer.
Step 2: Select the device in iTunes (under the Devices).
Step 3: Right-click on the device and choose the option “Restore from Backup”.
Way 3. Fix iPhone Front/Back Camera Not Working without Data Loss
If you want to fix this issue without any data loss, then iMyFone Fixppo is highly recommended.
iMyFone Fixppo is a very handy tool that can resolve various issues related to iOS devices. So, this is a mandatory app for those who have iPhone and wish to repair them on their own.
- It doesn’t require the device to be jailbroken to repair.
- Convenient UI design that helps even novices to operate it freely.
- It addresses variety of iOS related issues in a very quick time.
- It doesn’t retain any of your passwords or personal information.
- Compatible with all the iOS devices and iOS versions like iPhone 15 and iOS 17/18 beta/18.
- It has been trusted by many professional websites like Macworld, Cult of Mac, Payetteforward, Makeuseof and so on.

Here you know how powerful this tool is and let’s see how to use it.
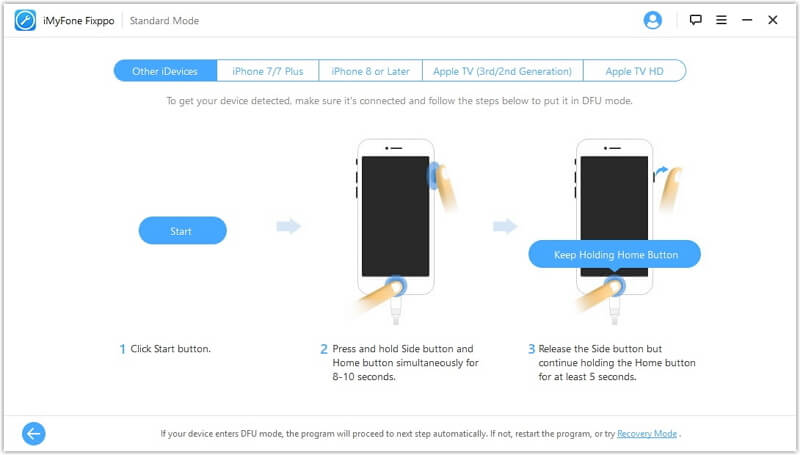
Step 1. First, launch iMyFone Fixppo on your computer and choose the Standard Mode. Then, connect the device to the same computer and hit Next. Your device should now be detected by the program. If not, you need put the respective device on DFU/Recovery mode.
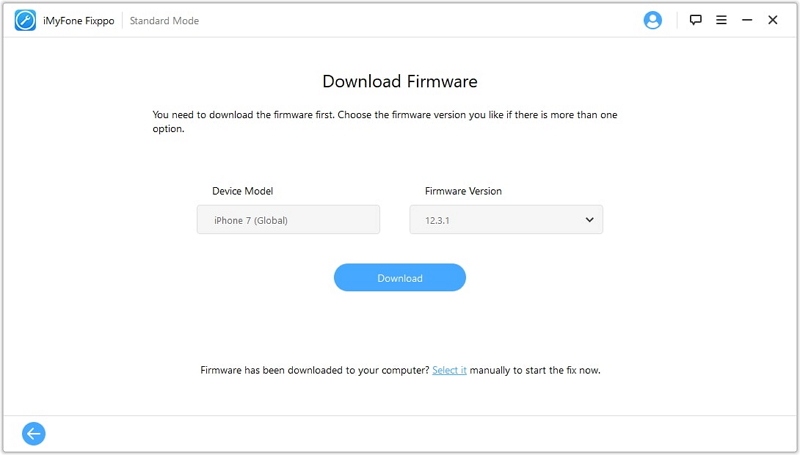
Step 2. Once the device is detected, the program will search for the latest firmware and display the results. You should select the appropriate version and download it by clicking on “Download” button.
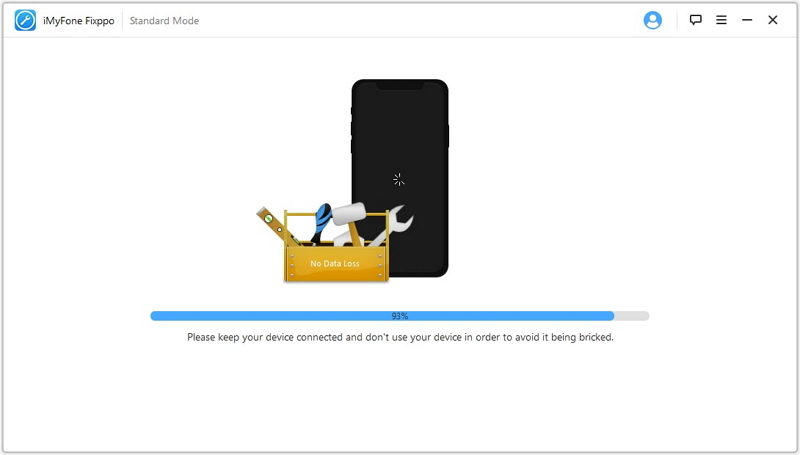
Step 3. At the completion of the download of the firmware, the repairing process might begin. To initiate that, you should simply press “Start” button. Make sure that the device is plugged in until the process is completed.
Conclusion
Now you have a good idea about solving the issues related to the camera of the iPhone. We hope these methods can get your camera back to normal. Just go through the list of options we have provided and choose the best one that matches your situation.
In addition to that, we will appreciate if you can leave a comment below explaining your honest experiences. Your feedback is exceptionally important to the growth of our platform. Also, your comments make our readers more knowledgeable.


 July 24, 2024