Sometimes, it feels it is inevitable that we’d face problems with our iOS devices, you may have forgotten your passcode or done something that totally wrong needs you to wipe your iPhone clean, it could also be that you can’t access your device anymore but would love to erase your device with recovery mode – something that might have resulted in your iPhone been disabled. If this is what you are going through right now, then I will advice you to read on.
Erase Your Device with Recovery Mode
If you have forgotten your iPhone passcode and you have never synced with iTunes before, then you will need to use recovery mode to restore your iPhone. To erase your device with recovery mode, you will need to follow the steps as bellow.
1. Open iTunes and connect your iOS device to your computer or Mac. If you don’t have one, borrow it from a friend or go to the Apple Retail Store.
2. After connecting your device to your computer, force restart your device:
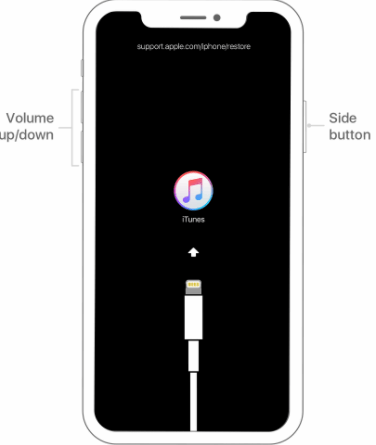
- For iPhone 8 or later: press and release the Volume Up button. Then press and release the Volume Down button. Press and hold the Side button until the recovery-mode screen shows up.
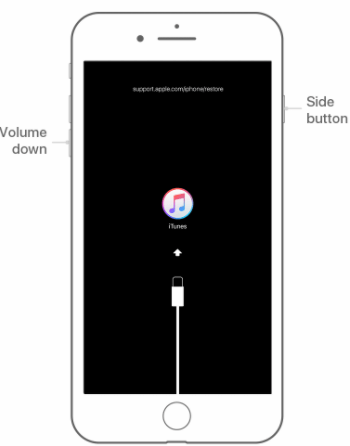
- For iPhone 7 or 7 Plus: Press and hold both the Side and Volume Down buttons at the same time. Keep holding them until the recovery-mode screen shows up.
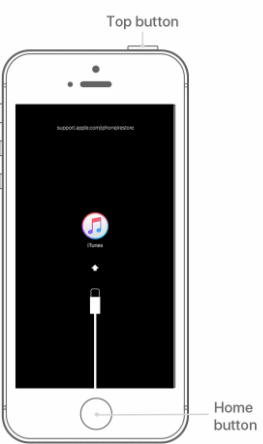
- For iPhone 6s and earlier: Press and hold both the Home and the Top (or Side) buttons at the same time. Keep holding them until the recovery-mode screen shows up.
3. Then you will see the option to Restore or Update, click Restore. If it takes more than 15 minutes, you device will exit the recovery mode, then you will need to repeat stpes 2 and 3.
Waif for the process to complete and then you can reuse your device again.
Pros and Cons to erase your device with recovery mode:
Pros
- Fix iOS installation and upgrade error;
- Fix touchscreen issue;
- Uninstall a bad beta;
- Bypass a forgotten passcode;
- Reboot loop problem in iPhone and more.
Cons
- It will erase all settings and data;
- Not ensure 100% success;
- Lose some non-iTunes content like apps and music.
Better Alternative to Erase Your Device with Recovery Mode
Consider all the pros and cons to erase your device with recovery mode, it would be better that you apply a safe way to fix this problem. Then making use of the iMyFone LockWiper would make absolute sense. The most interesting part for me knows you don’t need to provide a password before it (iMyFone LockWiper) gets the job done. So, what makes this software really special, the answer lies in the features.
Features of iMyFone LockWiper:
- It can help you erase your device with recovery mode easily.
- It can erase your device without knowing the passcode of your iPhone.
- It supports locked, broken screen and disabled iDevice with 4-digit/6-digit passcode, Face ID, pattern and Touch ID.
- It also remove Apple ID without password and lets you log in a new iCloud account.
How to use LockWiper to erase your device:
Video Tutorial about 3 Steps to Recover/Reset iPhone Passcode without Losing Data
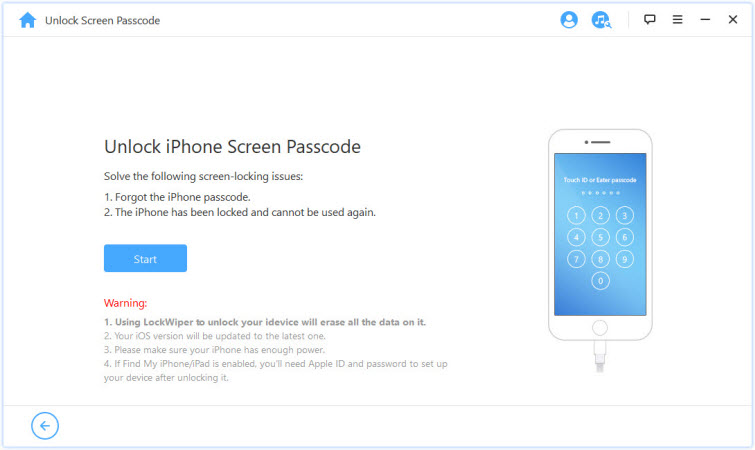
Step 1: Launch the iMyFone LockWiper, that after you’ve installed the software, you can then click Start to begin the whole process.
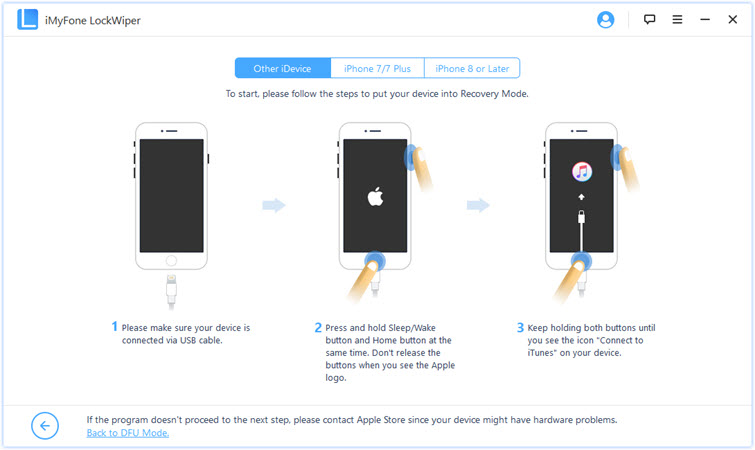
Step 2: After connect your device to computer; ensure to put your Device in Recovery Mode. If your device is already in Recovery Mode, then move to the next step.
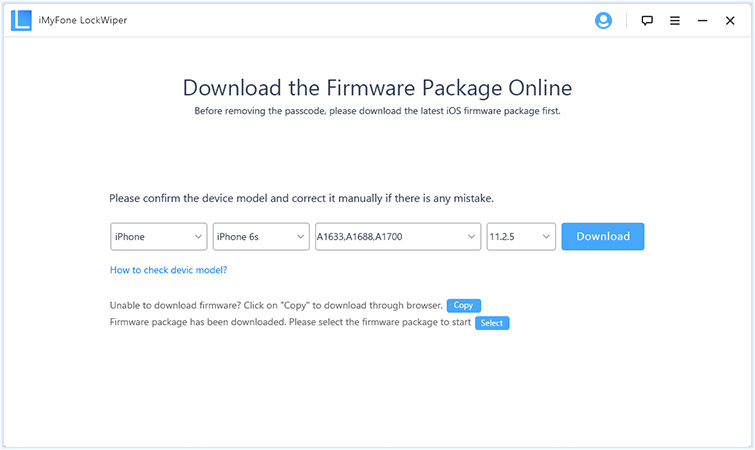
Step 3: Before you go ahead to download the firmware package, ensure that your iDevice model is auto-detected by the program if not, you can correct it manually. Then you can click ‘Download’.
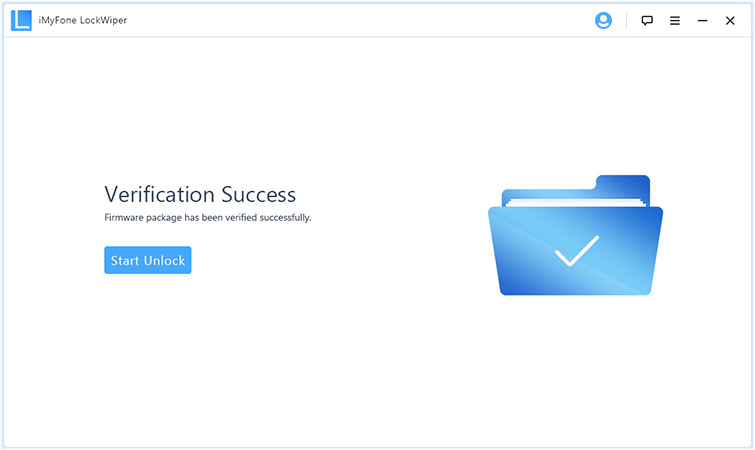
Step 4: After the firmware is verified, you will need to click on the ‘Start Unlock’ button to start the unlocking process.
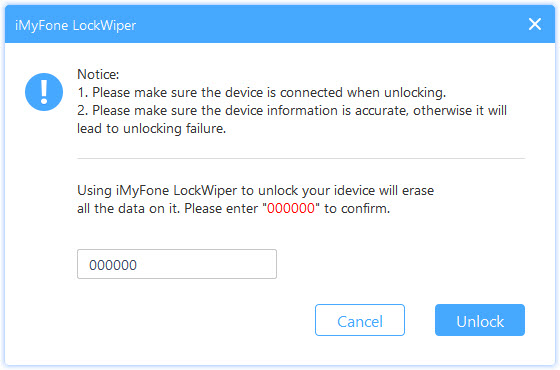
Step 5: Read the notice and type in the ‘000000’ to double confirm that you agree to unlock your Device.
Step 6: Wait for the process to finish, then your device will be erased successfully.
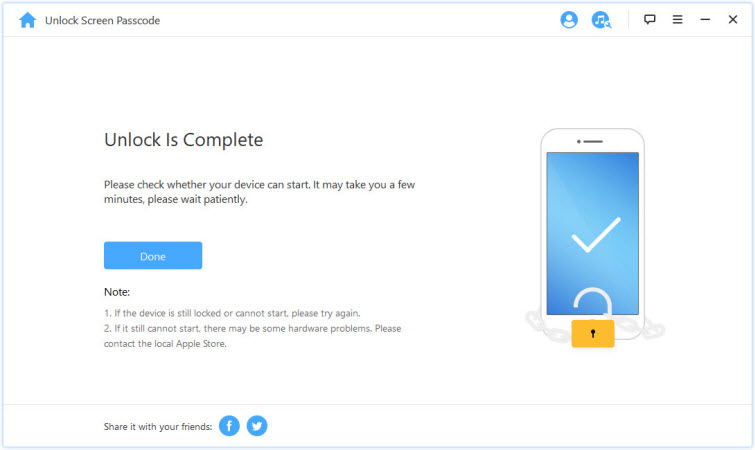
Note: The iOS version on your iDevice will be updated to the latest iOS 16.
The iMyFone LockWiper by far still remains the safest way to erase your iPhone when it is in the Recovery Mode. In the end, you’ve got nothing to worry about, just make use of this software and you are good to go.


 April 2, 2024

