[Full Guide] How Many Attempts to Unlock iPhone
Category: Unlock iPhone

6 mins read
How many attempts to unlock iPhone until it gets locked or disabled?
Do you also want to know the maximum iPhone lockout times? In this expert blog, we will answer this question in detail, in addition to exploring solutions to regain access to your iPhone without any problems.
So, let's dive into the secrets behind iPhone unlocking attempts.
In this article:
Part 1: How Many Attempts to Unlock iPhone?
Apple mandates that must be entered each time you try to unlock iPhone. This can safeguard iPhone data and prevent unauthorized users from stealing or tampering with it.
You are allowed a maximum of 5 tries to input passcode correctly. Starting with the sixth failure, the iPhone will be disabled for an incremental amount of time.
Here's a breakdown of iPhone lockout times.
| Failed Times | Consequence of Wrong Passcode Input |
|---|---|
| The first 5 failed | The iPhone will stay safe and allow you to continue inputting in a passcode. |
| On the 6th attempt | The iPhone will lock the user out for 1-minute. |
| On the 7th attempt | The iPhone will lock the user out for 5-minutes. |
| On the 8th failed attempt | The iPhone will be disabled for 15-minutes. |
| On the 9th failed attempt | The iPhone will locked for 1 hour. |
| On the 10th failed attempt | The iPhone will be permanently locked. |
- The Erase Data option is enabled: The data in the iPhone/iPad will be erased.
- The Erase Data option is disabled: iPhone/iPad will be permanently locked.
You need to connect it to iTunes and sync it to restore it. This means you'll need to back up your data to iCloud or back up to local storage.
Part 2: 4 Ways to Unlock iPhone after Too Many Attempts
If the thought of your iPhone being locked for even 5 minutes bothers you, let alone the impracticality of dealing with an hour-long lockup, then read on to fix how I can unlock my iPhone.
1 Unlock a Locked or Disabled iPhone Using LockWiper
If your iPhone is unusable due to multiple passcode entry errors and your iPhone has not been synchronized with iTunes and iCloud backups, then at this time iMyFone LocKWiper can effectively deal with long time lock on iPhone without any features or synchronization.
You don't need any enabling features, just 5 steps to easily unlock iPhone screen passcode, even if you forget your password, you can bypass the iPhone screen lock and access your iPhone.
- Unlock an iPhone that has been locked or disabled due to several incorrect passcode attempts.
- Unlock an iPhone when you’ve forgotten the iPhone password even with Find My on.
- Remove the passcode from second-hand/broken screen isn’t working iPhones.
- Support removal of 4-digit and 6-digit passcode.
- Unlock screen time passcode from all iOS devices without data loss, including iOS 17.
Video Tutorial about How Can I Unlock My iPhone
Steps to Unlock Locked/Disabled iPhone Without Passcode with LockWiper
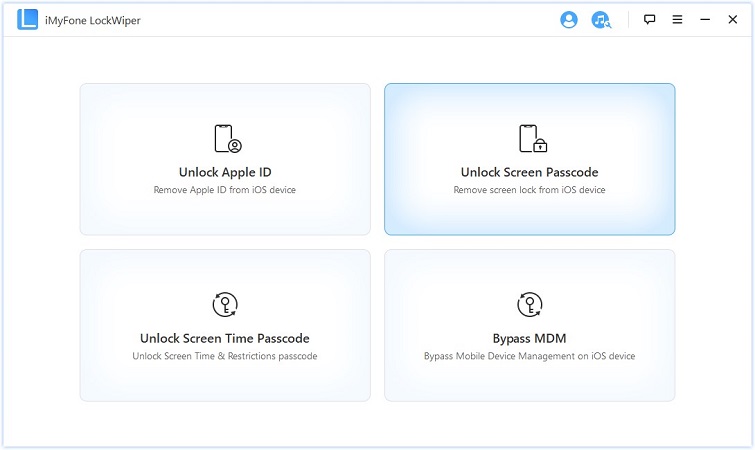
Step 1. Download and launch LockWiper. On the load-up screen, choose Unlock Screen Passcode.
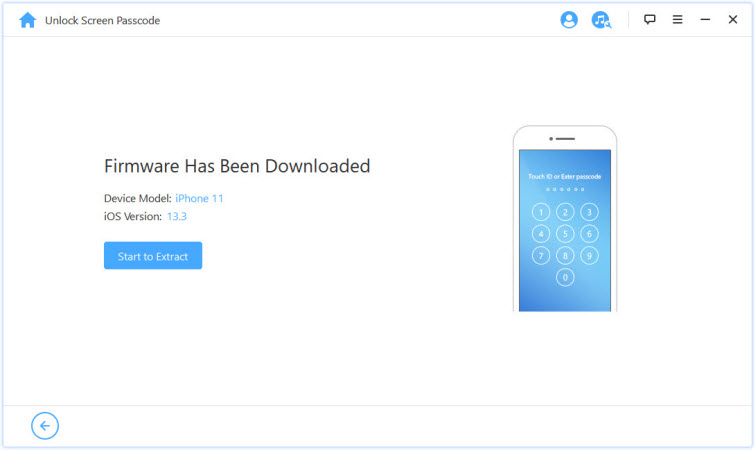
Step 2. Now connect your iPhone to your computer. Click Start and download the firmware package. Then extract it simply by clicking Start to Extract.
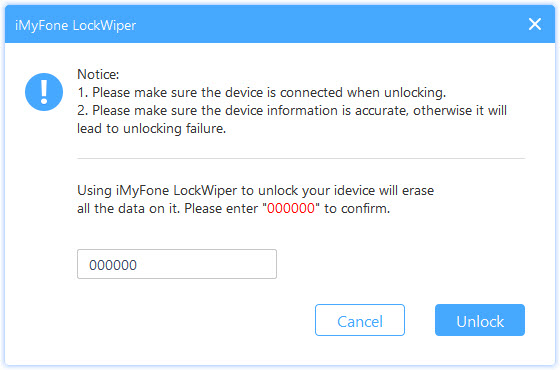
Step 3. Now click Start Unlock and enter 000000 to verify that you want to unlock your locked or disabled iPhone.
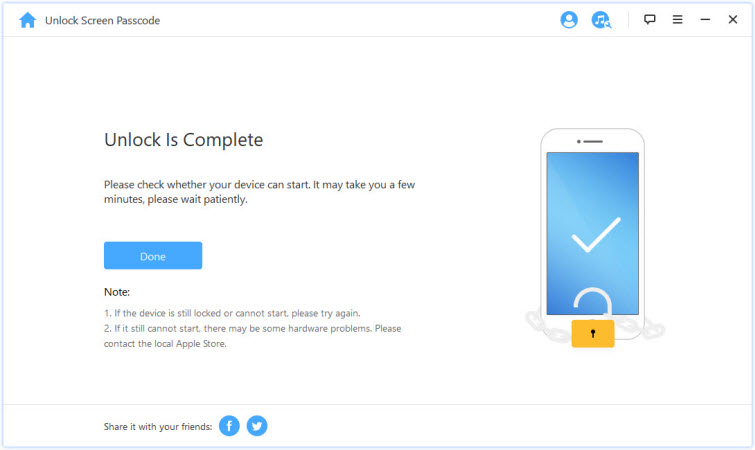
Step 4. LockWiper starts to unlock your iPhone and this whole process completes in less than 5 minutes.
With LockWiper, you don’t need to worry about how many attempts to unlock iPhone anymore.
It works to unlock iPhone screen even without turning on or synchronizing any features ahead of time and even if you don’t know all types of passwords, it can still help you clear the iPhone lockout times in 5 minutes easily.
2 Unlock a Locked or Disabled iPhone Using iTunes
If you used to sync your iPhone to iTunes on your computer, you can unlock a locked or disabled iPhone using iTunes without losing data (works with backups or no backups), by doing the following.
However, if Find My is enabled, or if iTunes asks you for the iPhone passcode, you can’t do this, and it’s recommended to use LockWiper.
- You need to launch iTunes which your iPhone has been synced to previously.
- You will need to be quick on canceling both the backup and syncing process.
A. With No Backups
Step 1. Open up iTunes on your personal computer.
Step 2. Connect your iPhone to the computer and wait. It should show up in the devices section once iTunes recognizes it.
Step 3. When it appears in the list, click on the iPhone name and choose the Set up as new iPhone instead of the restore option.
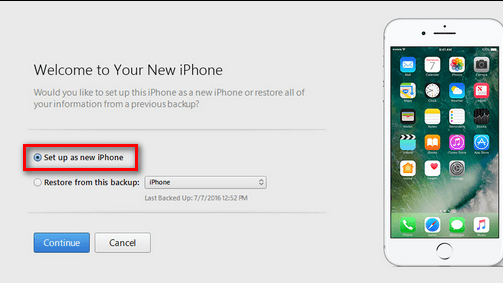
Step 4. When you hit the Set up as new iPhone option, you will then want to click Restore.
Step 5. Your iPhone will try to back up at this point, cancel this immediately by hitting the little x in the status window on iTunes.
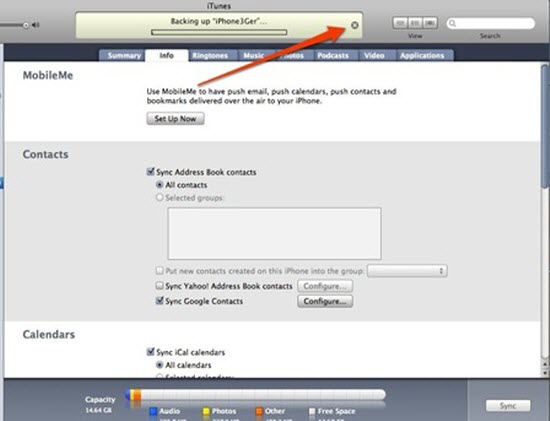
Step 6. Once you have canceled the backup, your iPhone will try to sync. Cancel this as well.
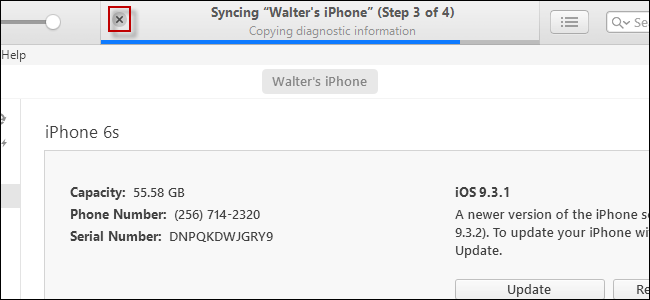
Now you will have an unlocked iPhone without going through the restoration or syncing process, giving you a reactivated device.
B. With Backups
Step 1. Follow steps 1-2 in the With No Backups procedure.
Step 2. Head to Summary and hit the Restore iPhone option.
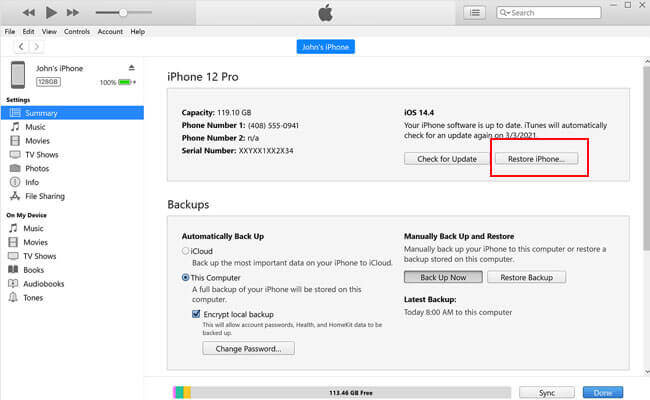
Step 3. Wait for iTunes to restore your iPhone. When it finishes, choose to restore from iTunes backups to get your data back.
This method requires that your iPhone has been synced with iTunes on your computer in advance, otherwise, it won't work and it sometimes fails to recognize your device due to iTunes glitches.
3 Unlock a Locked or Disabled iPhone Using Recovery Mode
You can also put your iPhone into Recovery Mode to force the removal of all content and passcodes.
- You have to have iTunes and access to a personal computer to use it.
- You are going to lose all of your data.
Step 1. Download and launch iTunes on your personal computer and plug in iPhone with a USB cable.
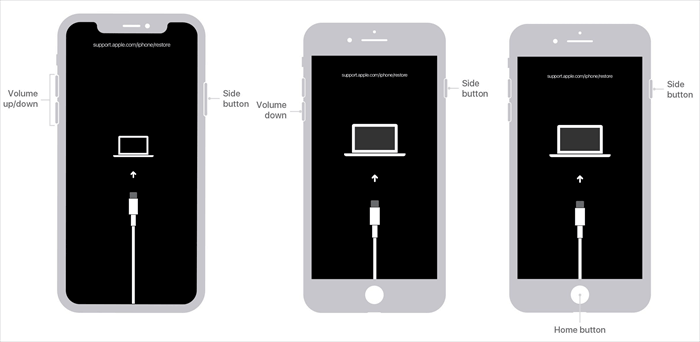
Step 2. Put the iPhone into Recovery Mode.
- For iPhone 6S or earlier: Press the Home Button and the Side Button at the same time.
- For iPhone 7/7 Plus: Press the Side Button and Volume Down button at the same time.
- For iPhone 8 or later: Press and release the Volume Up button. Press and release the Volume Down button. Press and hold the Side Button.
The iTunes connect screen will ask you to either restore or update your iPhone. You want to choose to restore it, which will reset your iPhone to factory settings.
This recovery process may take longer than 30 minutes to update and unlock your iPhone, and if it takes too long, your iPhone will automatically exit recovery mode and you will need to repeat the troublesome steps above again.
Download LockWiper to unlock disabled and unavailable iPhones in 5 minutes and get back to using devices.
4 Unlock a Locked or Disabled iPhone Using iCloud
If you have the Find My in iCloud enabled for your iPhone, and you have the Apple ID, then you can unlock a disabled or locked iPhone using iCloud.
- You need to have Apple ID and Find My enabled on your iPhone.
- Your iPhone needs to be connected to a network for it to work.
Step 1. Head to iCloud.com from another device such as a computer and use your Apple ID and password to log in.
Step 2. Once signed in, choose the All Devices at the top of your browser’s window and find your iPhone in the list.
If your iPhone is not on the list, use the Recovery Mode above.
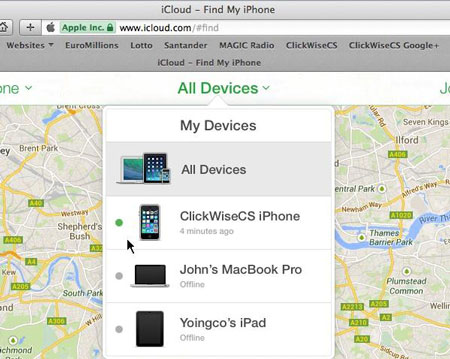
Step 3. Please notice that iPhone should be connected to a network for remote wiping, now choose your iPhone and erase it.
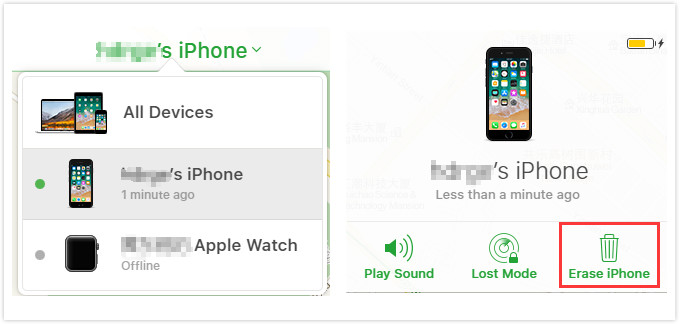
After unlocking iPhone remotely, you can restore iPhone from your backup, if you don't have a backup and you don't have Find My turned on, then this method won't work, we recommend you try method 1 with no limitation.
Part 3: How to Stop Wiping Data after Too Many Attempts
The security feature that is turned on by default is to delete all data after ten failed attempts to log into the iPhone, which ensures that sensitive data is not accessed by people who are not the owner of the iPhone or unauthorized.
However, you can stop your iPhone from wiping the data after too many failed attempts at unlocking your iPhone and here is how.
Step 1. Head to your Settings menu in your iPhone’s navigation panel and open it up.
Step 2. From the settings list, choose the Touch ID & Passcode option.
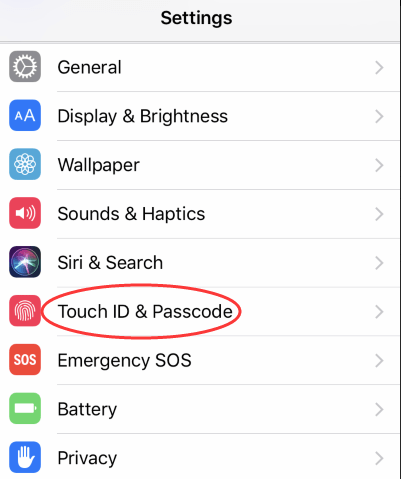
Step 3. You will be prompted to enter your current passcode. Enter it.
Step 4. By entering your current passcode, you get access to the Touch ID & Passcode menu which has options for requiring a passcode, what is accessible when the iPhone is locked and so on.
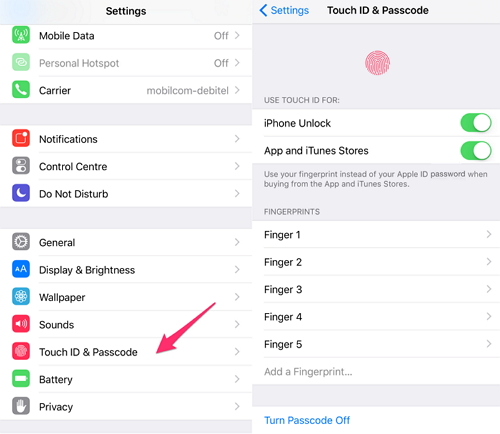
Step 5. Scroll down to the bottom of this menu and turn off the Erase Data option.
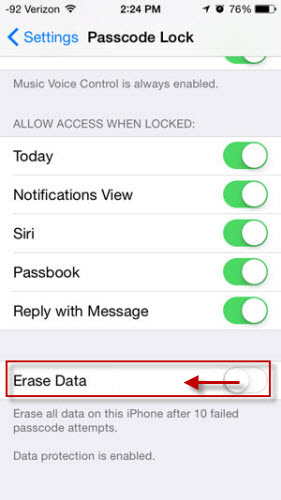
Now when ten failed attempts happen, your device data won’t be erased automatically. So no matter how many tries to unlock iPhone, you won’t worry about wiping data when it gets disabled anymore.
Part 4: FAQs about Unlock iPhone after Too Many Attempts
1 Is there unlimited passcode attempts iPhone?
NO, If you enter the wrong passcode six times in a row, you'll be locked out of your device, and you'll receive a message that says iPhone is disabled.
2 How many password attempts on iPhone?
Apple allows you to enter an incorrect passcode on your iPhone up to 9 times. If you fail to unlock your iPhone in 10 attempts, your iPhone will be disabled.
2 What is the longest iPhone lockout time?
When your iPhone says "iPhone is disabled, connect to iTunes" after 10 failed passcode attempts. It means that you have no chance to enter a passcode anymore.
Wrapping It Up
In short, the maximum lock time of your iPhone may last forever, thus rendering you unable to access and use your device.
However, by utilizing LockWiper as a handy tool, you can bypass the unavailable and locked-out screen with ease and regain access to your iPhone in less than 5 minutes without any limitation.


