If you like to organize your life, you no doubt have a lot of calendar entries on your device. Like every other type of data on your device, they are also prone to loss. Transferring your calendars to your Mac is one way to keep them safe just in case something happens to the iPhone and you lose them. In this article, we are going to be looking at two ways you can easily transfer Calendar entries from your iPhone to your Mac.
1Apple’s Way to Sync Calendars with Mac
With iCloud, you can easily sync your iPhone’s calendars with iCal just by signing into the same iCloud account on both the Mac and the iPhone. To set this up, follow these simple steps.
Step 1: Go to the Settings app on your iPhone and then tap on “iCloud.”
Step 2: Make sure that the slider next to “Calendars” is turned on.
Step 3: Now go to the Mac and the open iCal. Click on the Calendars button and your iPhone Calendars should be there.
Ensure that you are signed in to iCal with the same iCloud credentials for this method to work.
2Transfer Calendar from iPhone to Mac Using D-Back
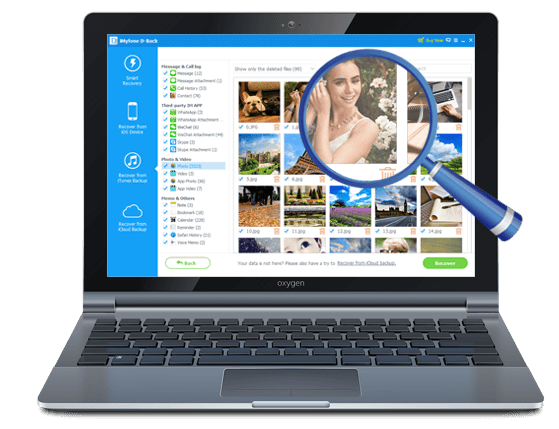
Syncing the calendars may work although sometimes the method may fail to produce the desired result due to problems beyond your control such as a less cooperative internet connection. In this case, you may need a solution that allows you to transfer the calendars to the Mac at your own time and convenience. This solution is iMyFone D-Back, a program that allows you to simply move all your Calendar entries to the Mac in just a few minutes.

iMyFone D-Back iPhone Data Recovery
- It can be used to transfer more than 22 different types of files including messages, music, notes, calendar and more.
- It is very easy to use and comes with a reliable preview function that makes selective data transfer very easy.
- It can also be used to gain access to the data on iCloud and iTunes backup files and transfer the data to the Mac.
- It supports all popular iPhone models, iPad models and iPods models.
Here’s how to use iMyFone D-Back to transfer Calendar to Mac.
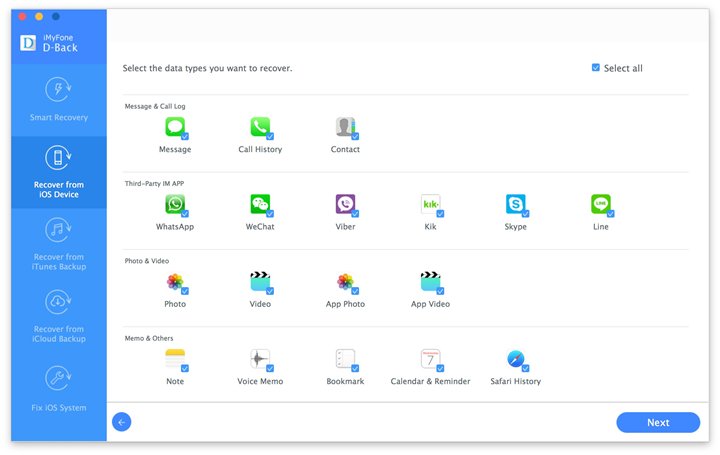
Step 1. Click on “Recover from iOS Device” and Select “Calendar & Reminder”
Download and install the program to your computer and then launch it. From the main window, select “Recover from iOS Device” and then click “Start.” Select “Calendar & Reminder” from the next window and click “Next” to continue.

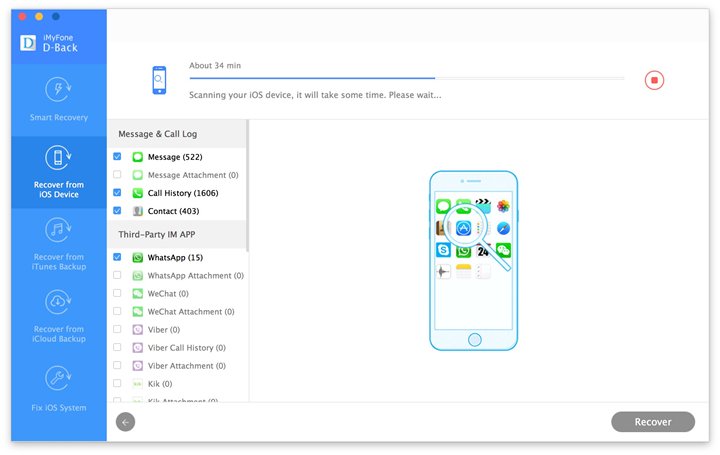
Step 2: Connect iPhone to Computer and Scan It
Connect the iPhone to the computer using USB cables and then click “Scan” when the program recognizes the device.

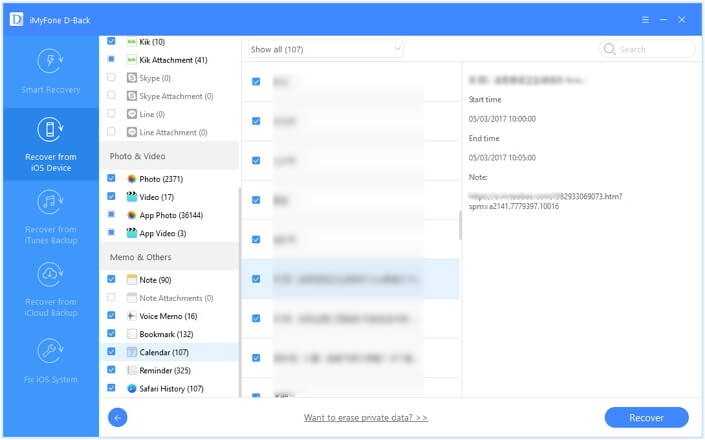
Step 3: Transfer the Calendar to Mac
When the scanning process is complete, select the calendar you want to transfer to the Mac and then click “Recover.” Select a location on the computer to save the calendar and you’re done.

It is that easy to transfer all Calendars from your iPhone to your Mac using iMyFone D-Back. You can also use the program to similarly transfer other types of data as well.


 January 12, 2023